

—
Conteúdo do artigo
Uma das partes mais emocionantes de obter novos uniformes de torcedora é o processo de design - ver a personalidade de sua equipe, cores da escola, e visão ganhar vida em forma de tecido. Mas se você nunca projetou uniformes personalizados antes, o processo pode se sentir esmagador.
Onde você começa? O que você precisa fornecer? Como você tem certeza de que o produto final parece profissional?
This guide guides you through every step of the custom cheerleading uniform design process from your first idea to the final production file.
—
Passo 1: Define Your Design Brief
Before you open any design software, start with a clear brief:
Escrever essas respostas antes de começar evita revisões de design médio - e poupa tempo e dinheiro.
—
Passo 2: Escolha sua paleta de cores
As cores da sua equipe são a base do design. Aqui está como trabalhar com elas:
- Serigrafia funciona melhor com 1-4 cores sólidas
- Sublimation allows unlimited colors and gradients with no additional cost
- Rhinestones are typically one color (usually crystal clear, black, or a team color)
—
Passo 3: Work with Your Logo and Mascot
The team mascot or logo is usually the centerpiece of the uniform. Here is how to handle it:
—
Passo 4: Choose Your Fonts and Typography
Typography is often underestimated in uniform design — but it has a huge impact.
—
Passo 5: Decide on Pattern and Layout
This is where the creative decisions get specific:
- Front: School name + small logo + number. Back: Large mascot + full team name + captain designation
- Front: Large team name. Back: Full mascot + individual athlete name + number
- Full sublimation: Mascot and design flow across front, back, and side panels continuously
—
Passo 6: Choose Your Customization Method
The customization method affects both cost and design possibilities:
| Method | Best For | Design Flexibility |
|——–|———-|——————-|
| Sublimação | Full-coverage, complex designs, gradients | Maximum |
| Screen printing | Simple 1-4 color designs | Moderate |
| Appliqué | Letterman-style, varsity numbers | Limited |
| Strass | Sparkle accents, logo highlights | Decorative only |
| Embroidery | Names on front, formal wear | Text and simple logos |
Most teams use a combination: sublimation for the body design, screen printing for numbers and names, rhinestones for sparkle.
—
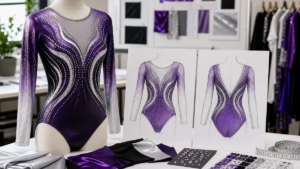
Passo 7: Review and Approve the Design Mockup
Before production begins, you will receive a digital mockup (usually a PDF or JPG) showing exactly how the uniform will look.
- [ ] All colors match your specifications exactly
- [ ] Logo proportions look correct on both front and back
- [ ] Text is readable and correctly spelled
- [ ] Numbers are in the right font and size
- [ ] No unintended text, watermarks, or placeholder elements
- [ ] Rhinestone placement is as discussed (if applicable)
- [ ] Side panel designs look balanced
- [ ] Athletes of different body types have been accounted for in the design
—
Passo 8: Order a Sample Before Bulk Production
If your order is 20+ units, always request a sample uniform before the full production run. This lets you:
- Verify the actual fabric quality and weight
- Check that sublimation colors match your mockup
- Confirm the fit on different body types
- See the rhinestone application quality (if applicable)
- Catch any errors before they are multiplied across 50+ uniforms
Most manufacturers offer a sample for a small fee (or waive it with a bulk order). Budget for this — it is much cheaper than reordering 50 wrong uniforms.
—
Pensamentos finais
Designing custom cheerleading uniforms is a creative process — but it does not have to be intimidating. Start with a clear brief, make deliberate choices about colors and fonts, and review the mockup carefully before approving.
The best uniforms tell a story: your team, your school, your identity. Take the time to tell that story well.
—
Get a free design consultation
—
Word count: ~1,150 | Etiquetas: custom-design, cheer uniform design, design process, team branding