—
Article Content
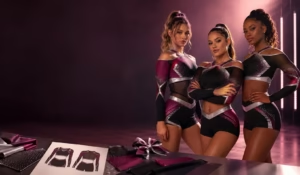
One of the most exciting parts of getting new cheerleading uniforms is the design process — seeing your team’s personality, school colors, and vision come to life in fabric form. But if you have never designed custom uniforms before, the process can feel overwhelming.
Where do you start? What do you need to provide? How do you make sure the final product looks professional?
This guide walks you through every step of the custom cheerleading uniform design process — from your first idea to the final production file.
—
Step 1: Define Your Design Brief
Before you open any design software, start with a clear brief:
Writing these answers down before you start prevents mid-design revisions — and saves time and money.
—
Step 2: Choose Your Color Palette
Your team colors are the foundation of the design. Here is how to work with them:
- Screen printing works best with 1-4 solid colors
- Sublimation allows unlimited colors and gradients with no additional cost
- Rhinestones are typically one color (usually crystal clear, black, or a team color)
—
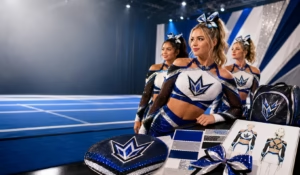
Step 3: Work with Your Logo and Mascot
The team mascot or logo is usually the centerpiece of the uniform. Here is how to handle it:
—
Step 4: Choose Your Fonts and Typography
Typography is often underestimated in uniform design — but it has a huge impact.
—
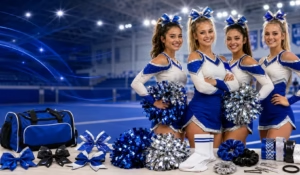
Step 5: Decide on Pattern and Layout
This is where the creative decisions get specific:
- Front: School name + small logo + number. Back: Large mascot + full team name + captain designation
- Front: Large team name. Back: Full mascot + individual athlete name + number
- Full sublimation: Mascot and design flow across front, back, and side panels continuously
—
Step 6: Choose Your Customization Method
The customization method affects both cost and design possibilities:
| Method | Best For | Design Flexibility |
|——–|———-|——————-|
| Sublimation | Full-coverage, complex designs, gradients | Maximum |
| Screen printing | Simple 1-4 color designs | Moderate |
| Appliqué | Letterman-style, varsity numbers | Limited |
| Strass | Sparkle accents, logo highlights | Decorative only |
| Embroidery | Names on front, formal wear | Text and simple logos |
Most teams use a combination: sublimation for the body design, screen printing for numbers and names, rhinestones for sparkle.
—
Step 7: Review and Approve the Design Mockup
Before production begins, you will receive a digital mockup (usually a PDF or JPG) showing exactly how the uniform will look.
- [ ] All colors match your specifications exactly
- [ ] Logo proportions look correct on both front and back
- [ ] Text is readable and correctly spelled
- [ ] Numbers are in the right font and size
- [ ] No unintended text, watermarks, or placeholder elements
- [ ] Rhinestone placement is as discussed (if applicable)
- [ ] Side panel designs look balanced
- [ ] Athletes of different body types have been accounted for in the design
—
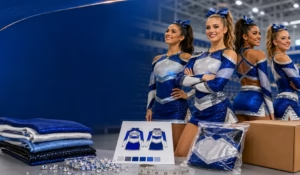
Step 8: Order a Sample Before Bulk Production
If your order is 20+ units, always request a sample uniform before the full production run. This lets you:
- Verify the actual fabric quality and weight
- Check that sublimation colors match your mockup
- Confirm the fit on different body types
- See the rhinestone application quality (if applicable)
- Catch any errors before they are multiplied across 50+ uniforms
Most manufacturers offer a sample for a small fee (or waive it with a bulk order). Budget for this — it is much cheaper than reordering 50 wrong uniforms.
—
Final Thoughts
Designing custom cheerleading uniforms is a creative process — but it does not have to be intimidating. Start with a clear brief, make deliberate choices about colors and fonts, and review the mockup carefully before approving.
The best uniforms tell a story: your team, your school, your identity. Take the time to tell that story well.
—
Get a free design consultation
—
Word count: ~1,150 | Tags: custom design, cheer uniform design, design process, team branding