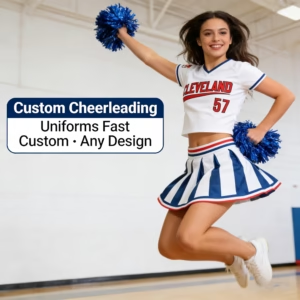
When I look at custom cheerleading uniforms, I don’t start with colors or sparkles. I begin with the process.
That might not sound as exciting as sketches and fabric swatches, but in my experience, the teams and brands that get the best final result are usually the ones that know how customization works before they place an order.
A cheerleading uniform is more than just clothes. It needs to look good, move well, fit all kinds of athletes, and get to training, tryouts, games, or the competition season on time. Even a well-designed product can have sizing issues, approval delays, or production mistakes if the process is rushed or not clear.
That’s why I always like to break up the process of customizing cheerleading uniforms into easy-to-follow steps. It makes it easier to make decisions, cuts down on mistakes in communication, and gives the buyer more control over the whole process, from idea to delivery.
This guide will show you the whole process as I would explain it to a team buyer, a new brand, a school program, or a distributor in the U.S. or Europe.
Why the process of customization is important
It’s not the same to handle custom cheerleading uniforms as it is to handle regular clothes. A lot of suppliers now offer fully customizable options, like sublimated uniforms, adding logos, picking your own colors, and other ways to decorate. Some people also suggest fit kits or sizing samples before production because custom orders usually take longer to process and can’t be returned once they’re approved.
That’s important because the real job isn’t just to make a pretty design. The real job is to make sure the final uniform works in real life: it fits well, looks good, and can be worn again and again.
Step 1: Define the purpose of the uniform
The first thing I want to know is what this uniform is for.
Not all cheerleading uniforms are the same. When making a sideline uniform, a school spirit uniform, an all-star competition uniform, or a branded team program outfit, you may have to make very different choices about how to build, finish, and style the outfit.
If I don’t do this step, the rest of the project usually gets messy. The neckline, sleeve style, skirt shape, level of compression, embellishments, and fabric choice all depend on where and how the uniform will be worn.
I usually define the project in one of these ways:
- school or college sideline wear
- competition uniform
- all-star team uniform
- youth team uniform
- private label teamwear collection
- club or gym program uniform
Once you know that, customizing is much easier.
Step 2: Build the design direction
After the use case is clear, I move to the visual brief.
At this point, the team or buyer should choose the things that can’t be changed, like the colors of the team, the placement of the logo, the silhouette, the length of the sleeves, the neckline, the structure of the skirt or dress, and the overall look they want to show.
Some buyers already have a complete design in mind. Some people only have a few references. Both are okay. What matters is making a clear production brief out of general ideas.
For me, a strong design brief usually includes:
- brand or team name
- logo files
- exact color references
- preferred style references
- decoration preferences such as rhinestones, screen print, embroidery, or sublimation
- target price range
- target delivery date
At this point, I also try to stop overdesigning. A uniform can look strong without trying to follow every trend at once. Cleaner layouts often last longer and are easier to rearrange later.
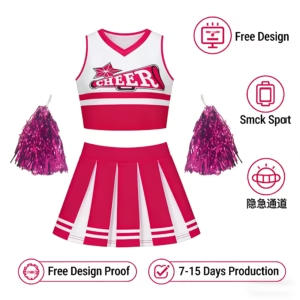
Step 3: Choose the right customization method
This is one of the most useful steps in the process because different ways of decorating and making things change how they look and work.
Most custom cheerleading suppliers offer options like embroidery, tackle twill, screen printing, rhinestones, and fully sublimated uniforms. Sublimation is very popular because it lets teams customize styles, colors, and logos right in the design. The color and graphics are also fused into the fabric instead of sitting on top of it. Suppliers also say that sublimated lettering and designs are less likely to peel or fade when you use them.
When I think about ways to customize things, I usually divide them up like this:
Sublimation
Best for when I want bright graphics, easy color control, and more design options. This is great for modern looks and teams that want a lighter, more cohesive visual effect.
Tackle twill or embroidery
Better for names, lettering, or showing off a logo that will last a long time when I want a more classic or traditional team look.
Rhinestones and other decorations
Good for styling that is driven by competition and wants to make an impact on stage. But I would always look at the care instructions, the budget, and how long I expected it to last first.
Not just how it looks, but also how the team looks, how much money they have, and how well they need to perform.
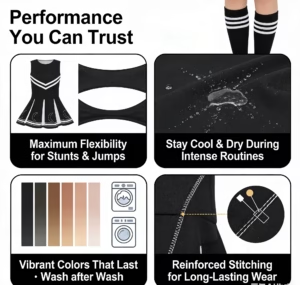
Step 4: Confirm fabric and performance expectations
A cheerleading outfit needs to look good in pictures as well as work well.
That’s why I always ask the supplier to tell me about the fabric’s composition, stretch, lining, opacity, recovery, breathability, and care instructions. The buyer should know if the fabric allows for movement and if the fit stays the same after being worn many times if the uniform is for active activities.
Some companies also market their uniforms as being environmentally friendly or made from special performance materials. For example, Varsity promotes an eco-friendly line that uses materials like braids made from recycled plastic bottles and highlights custom fit options.
That doesn’t mean that every buyer needs eco-friendly materials. It just shows that choosing the fabric is now a part of the customization conversation, not something that comes up later.
Step 5: Handle sizing carefully
Sizing is the one step I would never take lightly.
Even if the design is great, it can still fail if the fit isn’t the same for everyone on the team. Some custom uniform suppliers suggest ordering fit kits or sizing samples before the final production. This is very important because custom orders are often not returnable and are made just for the approved order.
When I manage this stage, I want:
- a clear size chart
- measurement instructions
- fit sample access if possible
- confirmation of youth vs. adult sizing logic
- written approval before production
This step can help you avoid a lot of stress later on if you have a big team or program.
Step 6: Review artwork and pre-production approvals
This is where I slow things down on purpose.
Before production starts, I want to make sure that every visible and technical detail is correct:
- front and back views
- color layout
- logo placement
- spelling
- trim details
- decoration positions
- size breakdown
- quantity by style
- packaging notes
- shipping marks if needed
I have found that most mistakes that can be avoided don’t happen when you sew. They happen when you get approval.
That’s why I always see final artwork confirmation as a real checkpoint, not just a formality.
Step 7: Sample first if the project is important
I usually suggest a sample before mass production if the order is big, brand-sensitive, or linked to a launch schedule.
A sample lets the buyer see if the design works in real life, not just on a computer screen. It also helps check the fit, feel of the fabric, color balance, quality of the decoration, and overall finish.
Sampling is even more useful for a brand or club that plans to order again in the future because it helps set a more stable product standard.
Step 8: Confirm lead time and production schedule
One of the most underrated parts of getting a custom cheerleading uniform is the lead time.
Custom suppliers are clear that making custom orders takes more time. For instance, Omni Cheer says that custom orders usually ship six weeks after they are placed, plus the time it takes to ship.
Not every supplier will follow the same schedule, but buyers should never think that custom uniforms can be treated like ready-made stock.
When I plan a project, I usually work backward from the wear date and leave room for:
- design discussion
- artwork revision
- sizing collection
- sampling if needed
- production
- shipping
- possible corrections or delays
This becomes more important the closer the project gets to the start of the competition season, tryouts, or opening events.
Step 9: Understand rules, use context, and wear expectations
The buyer should also think about whether the style of the uniform fits the event for school and competition programs.
In some situations, it matters that everyone follows the same rules. For instance, Varsity’s published competition materials say that there are uniform rules in some divisions, such as when traditional sideline uniforms are needed for Game Day categories.
This is not a small thing to me. When making a uniform for school or competition, the design should match the setting, not just what the team likes to look at.
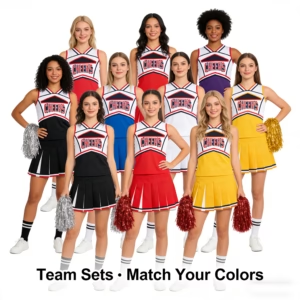
Step 10: Think beyond delivery
For me, a good customization partner is more than just someone who ships the order. It helps the team reorder smoothly, keep things consistent, and not have to start over from scratch with the same specification next season.
That’s why I like suppliers who can keep track of:
- approved colors
- logo files
- sizing standards
- artwork history
- previous order details
- packaging preferences
This is especially useful for schools, clubs, and brands that want continuity across future seasons.
The cheerleading uniform customization process I trust most
If I had to simplify the whole process, I would put it this way:
A successful custom cheerleading uniform project usually follows this sequence:
define the use case, build the design brief, choose the customization method, confirm fabric, lock sizing, approve artwork, sample if needed, schedule production early, and prepare for future reorders.
That may sound basic, but that structure is what protects the result.
The biggest mistake I see is not “bad taste.” It is poor process control.
What I would look for in a customization partner
If I were choosing a manufacturer or uniform supplier, I would look for five things first:
1. Clear communication
I want fast, specific answers, not vague promises.
2. Real sizing support
A supplier that offers fit guidance or sample support is usually easier to work with on team orders.
3. Flexible customization options
I want to know whether the supplier can handle sublimation, logo placement, decoration choices, and practical design revisions.
4. Honest lead times
A trustworthy partner tells me the real schedule, not the ideal one.
5. Repeatability
I do not want a one-time result that cannot be reproduced later.
Final thoughts
Before production even starts, I think the best way to customize a cheerleading uniform is to make sure everything is in order.
A custom uniform should definitely look cool, but the most important thing is how well the process has been handled behind the scenes. When the design, rahi, fabric, approvals, and lead time are all handled correctly, the final product is usually stronger, more comfortable to wear, and easier to order again.
That’s why I always tell buyers the same thing: don’t just look at the mockup when choosing a customization partner. You can tell how good they are by how well they help you go from idea to finished uniform.
That’s exactly how I would do it if I were working on a teamwear or private label project right now.